


PoE Necromancer Guide – The Tankiest Build Around
In Path of Exile 3.9’s Metamorph league, Necromancers have taken over as the class to play. In fact, 30% of all players over level 95 in the softcore league are Necromancers! But within that there are many different variations, and it can be difficult to know which one to play. I myself have gone through and played nearly every variation available, and have come to the conclusion that this build is the best for all-around content. Bonus points? It’s also the cheapest. And the tankiest. Honestly this build is a bit broken, and today we’re going to walk you through it.
Build Concept
If you’ve played Zombie builds, you’ll know that while their clear is excellent, their single target can be sorely lacking. If you’ve played Skeleton builds, you’ll know that while their clear is lacking, their single target is excellent. You see where I’m going with this? By using both Zombies and Skeletons we manage to hit all niches of strong map clearing. The Zombies blast through the main map while the Skeletons are used on tanky rares, the boss, and the Metamorph. The build makes use of The Baron in order to scale Zombie damage while scaling our own health. You might wonder about the Skeleton damage, but don’t worry, their base damage is high enough that they are still powerhouses without massive amounts of scaling.
As for your own character, like I said we use The Baron. The goal of this build is to hit 1000 Strength so that Zombies leech to you. Side effect of having 1000 Strength? A whole lot of bonus Life. This build has around 6k Life without too much investment. But it doesn’t stop there, we might as well make use of that 1000 Strength in more ways than just The Baron. By using Geofri’s Sanctuary that Strength is also gained as a quite high amount of Energy Shield. Using Shaper’s Touch that ES is scaled up even higher. My own build has 1300 Strength, and with very minimal ES scaling I’m sitting at over 4000 Energy Shield in base.
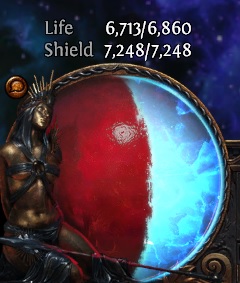
But why stop there? We’re a Necromancer, so we can make use of Mistress of Sacrifice, which allows our Offering skills to apply to us. By using this alongside Spirit Offering, we gain a portion of our Life as Energy Shield. Since we have so much life, and a bit of ES scaling, this bonus ES is ballooned up to being several thousand bonus ES. Oh, and you can recast it as often as you want to heal up that amount. We use Cyclone, Cast While Channeling, Desecrate, Spirit Offering in order to cast Spirit Offering over and over again, gaining over 2000 ES multiple times a second. So you have the build! Zombies and Skeletons for damage, Spirit Offering, Zombie leech, and around 12,000 combined Life and ES for defenses. And all of this only costs a couple exalts.
You May Like

Core Items
I mentioned several of the core items above, but I’ll go over them again here, as well as the others that I left out. For your helmet you’ll want to use The Baron. This is what the build is based around – having 1000 Strength to scale your Zombies’ damage and allow them to leech to you. You also get an extra Zombie for each 300 Strength you break. Obviously the rest of our build will be based around Strength scaling! For the body armour we use Geofri’s Sanctuary. This chest grants us Energy Shield for how much Strength we have. Try to get at least a five link, with six sockets – you will need every socket you can get. The gloves will be Shaper’s Touch, which further scales our Energy Shield based on our Strength total.
Your Amulet will be Astramentis. If you can get a decently rolled one and use the Intrinsic Catalysts to add 20% more attributes, this amulet alone will easily give you 140 base strength. Not to mention enough other stats to wear all your gear without worry. You will be anointing this with Death Attunement. This can be moderately expensive, but allows us to have another of each summon we use, so it is definitely worth the investment. For your boots get a pair of Alberon’s Warpaths with 18% increased Strength. Not much to say here, we want to scale Strength, and they will be a couple of Chaos. For Rings, simply be sure to cap your resistances while getting as much Strength and Life as you can, within reason. If you can find Chaos resistance here, that’s awesome.
Your weapon and Belt are the only things that aren’t cookie-cutter. For your weapon you will want to buy a 6 linked staff and get +1 to Level of Socketed Gems as a stat on it. This is the only stat that you need, so if you cannot find a cheap one with the modifier, roll one yourself by using Orbs of Alterations or even Chaos Orbs. Be sure to buy a 6 linked base if you go this route, as 6 linking it would be far more expensive than rolling the modifier. Once you have the mod, craft on any minion stats you can, and call it a day.
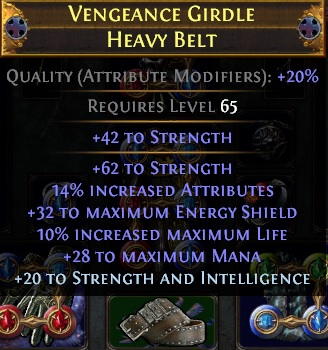
Your belt you will want to get a belt with Increased Attributes. This is a % increase that can only be found on belts influenced by The Elder. In addition you will want to find as much Strength as possible, ideally by using a Heavy Belt. If you can roll the bonus attributes and bonus strength, Catalysts will once again give you a nice Strength buff.
For Jewels, you will need to buy one Efficient Training. This will be placed just to the left of the Witch start, and will give you a huge amount of bonus Strength. The other Jewels will just be focused on, in order of importance, resistances, strength, life, energy shield, and minion damage.
Passive Tree and Skill Gems
As mentioned above, the jewel socket just to the left of the Witch start is reserved for Efficient Training, but the others will be filled by rares. Ascendancy order is: Mindless Aggression, Unnatural Strength, Mistress of Sacrifice, and lastly Bone Barrier – remember that Bone Barrier will give you 30% all resists, so it’s advisable to finish your final lab before killing Kitava in Act 10. For leveling, I suggest using Zombies supported by Infernal Legion, Minion Damage, and Elemental Focus in a Wraithlord. If you’d rather use Zombies, feel free to, they just die a lot while leveling.
As for gems, we’ll simply list what you should have in each piece of gear.
Staff: Raise Zombie, Minion Damage, Melee Physical Damage, Multistrike, Feeding Frenzy, Empower/Minion Speed.
Body: Vaal Summon Skeletons, Minion Damage, Feeding Frenzy, Melee Splash, Melee Physical Damage. If you have a 6L, add in Multistrike.
Helm: Raise Spectre, Blood Magic, Meat Shield, Animate Guardian/Carrion Golem.
Boots/Gloves: Cyclone, Cast While Channeling, Desecrate, Spirit Offering.
Boots/Gloves: Summon Skitterbots, Blasphemy, Vulnerability, Dread Banner.
Ring/Extra link on body: Flame Dash, Convocation (drop either of these or Dread Banner if you don’t have an extra socket).
Playstyle
The playstyle of this build is about as easy as it gets. Run through the map as fast as your Zombies will allow, making sure they kill the majority of monsters. Cyclone when necessary to keep Spirit Offering always up, and be sure to use it frequently if you’re in a dangerous situation. On bosses simply summon your Skeletons and Cyclone until the boss dies (Cyclone away from the boss if it’s dangerous, the Cyclone damage doesn’t matter and it will keep you safer). Use your Vaal Summon Skeletons as you see fit, and remember that they last long after the Vaal Skills cannot be used debuff, so you will often times be able to chain your Vaal Skeletons, meaning you can use them far more frequently and with less thought than other Vaal skills.
Keep your distance from Metamorphs! On bosses you aren’t worried about, standing on top of them means more damage because of the Vulnerability curse you are running, but for dangerous bosses you should keep your distance. Until further notice, all Metamorphs are dangerous bosses, and you should stay as far away from them as possible. If you notice your Zombies losing a lot of health, or you see the boss winding up for a big attack, make use of Convocation. It will pull your Zombies to you, taking them out of harms way, and also give them a healing buff to get them fighting fit once more.
Final note, keep an Enduring Mana Flask in your inventory. It will allow you to run cannot regen maps, but it will also be extremely helpful for resummoning your Zombies. Any time they die or you relog, simply unsocket your Cast While Channeling gem, use Desecrate a bunch, put on your mana flask and use it, and resummons all the Zombies. Then put the gem back in, swap flasks again, and you’re good to go. It can be a pain, but your Zombies won’t be dying very often if you’ve set up properly. And have fun blasting through all content on a build that costs less than most people’s 6 link!


